1.6. Summary
In the last few sections, we have discovered the basics of starting a DataLad dataset from scratch, and making simple modifications locally.
An empty dataset can be created with the datalad create command. It’s useful to add a description to the dataset and use the
-c text2gitconfiguration, but we will see later why. This is the command structure:datalad create --description "here is a description" -c text2git PATH
Thanks to Git and git-annex, the dataset has a history to track files and their modifications. Built-in Git tools (git log) or external tools (such as
tig) allow to explore the history.The datalad save command records the current state of the dataset to the history. Make it a habit to specify a concise commit message to summarize the change. If several unrelated modifications exist in your dataset, specify the path to the precise file (change) that should be saved to history. Remember, if you run a datalad save without specifying a path, all untracked files and all file changes will be committed to the history together! This is the command structure:
datalad save -m "here is a commit message" [PATH]
The typical local workflow is simple: Modify the dataset by adding or modifying files, save the changes as meaningful units to the history, repeat:
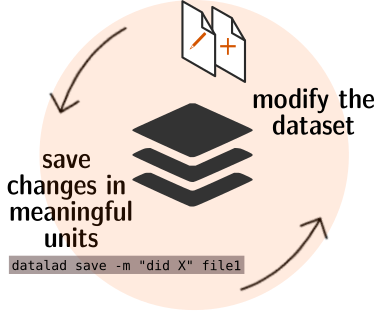
Fig. 1.3 A simple, local version control workflow with DataLad.
datalad status reports the current state of the dataset. It’s a very helpful command you should run frequently to check for untracked or modified content.
datalad download-url can retrieve files from websources and save them automatically to your dataset. This does not only save you the time of one datalad save, but it also records the source of the file as hidden provenance information.
Furthermore, we have discovered the basics of installing a published DataLad dataset, and experienced the concept of modular nesting datasets.
A published dataset can be installed with the datalad clone command:
$ datalad clone [--dataset PATH] SOURCE-PATH/URL [DESTINATION PATH]
It can be installed “on its own”, or within an existing dataset.
The command takes a location of an existing dataset as a positional argument, and optionally a path to where you want the dataset to be installed. If you do not specify a path, the dataset will be installed into the current directory, with the original name of the dataset.
If a dataset is installed inside of a dataset as a subdataset, the
--dataset/-doption needs to specify the root of the superdataset.The source can be a URL (for example of a GitHub repository, as in section Install datasets), but also paths, or open data collections.
After datalad clone, only small files and metadata about file availability are present locally. To retrieve actual file content of larger files, datalad get PATH downloads large file content on demand.
datalad status --annex or datalad status --annex all are helpful to determine total repository size and the amount of data that is present locally.
Remember: Super- and subdatasets have standalone histories. A superdataset only stores which version of the subdataset is currently used.
1.6.1. Now what I can do with that?
Simple, local workflows allow you to version control changing small files, for example your CV, your code, or a book that you are working on, but you can also add very large files to your datasets history. Currently, this can be considered “best-practice building”: Frequent datalad status commands, datalad save commands to save dataset modifications, and concise commit messages are the main take aways from this. You can already explore the history of a dataset and you know about many types of provenance information captured by DataLad, but for now, its been only informative, and has not been used for anything more fancy. Later on, we will look into utilizing the history in order to undo mistakes, how the origin of files or datasets becomes helpful when sharing datasets or removing file contents, and how to make changes to large content (as opposed to small content we have been modifying so far).
Additionally, you learned the basics on extending the DataLad-101 dataset and consuming
existing datasets:
You have procedurally experienced how to install a dataset, and simultaneously you have
learned a lot about the principles and features of DataLad datasets.
Cloning datasets and getting their content allows you to consume published datasets.
By nesting datasets within each other, you can re-use datasets in a modular fashion. While this may
appear abstract, upcoming sections will demonstrate many examples of why this can be handy.