DataLad tutorial at the MPI Leipzig
This code belongs to the DataLad for open science intro session at the MPI Leipzig. Copy-paste them into your terminal to follow along.
Introduction & set-up
In order to code along, you should at least have DataLad version 0.12 or higher.
You can check with the following command:
datalad --version
You should also have a configured Git identity. Here is how you set it:
git config --global --add user.name "Adina Wagner"
git config --global --add user.email "adina.wagner@t-online.de"
DataLad is a command line tool and it has a Python API. Whenever I use it, I thus operate it in a terminal using the command line as above, or I use it in scripts such as shell scripts, Python scripts, Jupyter Notebooks, and so forth. This is how you would import DataLad’s Python API:
ipython       # if not installed, use python
>>> import datalad.api as dl
>>> exit
DataLad datasets
Creating a dataset is done with the datalad create command.
This command only needs a name, and it will subsequently create a new directory under this name and instruct DataLad to manage it.
Here, the command also has an additional option, the -c yoda option.
With the -c option, datasets can be configured in a certain way at the time of creation.
You can find out about the details of the yoda configuration in the datalad handbook in sections Configurations to go, but in general this configuration is a very useful standard configuration for datasets for data analysis, as it preconfigures a dataset according to the yoda princples:
datalad create -c yoda myanalysis
After creating it, the dataset is a new directory, and you can “change directories” (cd) inside it:
cd myanalysis
Here is how the directory looks at the moment:
tree # lists the file structure
The YODA procedure pre-created a useful directory structure and added some placeholder README files.
If you list all of the hidden files with ls -a as well, you can see that tools such as Git and DataLad operate in the background, with hidden directories and files:
ls -a # show also hidden files
Version control
Version controlling a file means to record its changes over time, associate those changes with an author, date, and identifier, creating a lineage of file content, and being able to revert changes or restore previous file versions.
DataLad datasets use two established version control tools: Git and git-annex.
Thanks to those tools, datasets can version control their contents, regardless of size.
Let’s see what happens when we delete placeholders in the README:
echo " " >| README.md # this overwrites existing contents
datalad status can report on the state of a dataset. As we modified a version controlled file, this file shows up as being “modified”:
datalad status
What has changed compared to the files last known version state? The git diff can tell us:
git diff
Let’s also replace the contents of the other README:
echo " " >| code/README.md
git diff
In order to save a modification one needs to use the datalad save command.
The -m/--message option lets you attach a concise summary of your change.
Such a commit message makes it easier for others and your later self to understand a dataset’s history:
datalad save -m "Replace placeholder in README"
Note that datalad save will save all modifications in a dataset at once!
If you have several modified files, you can supply a path to the file or files you want to save:
# make some more edits to the file
nano README.md
Here is what you changed:
git diff
You can add a path to make sure only modifications in the specified file are saved:
datalad save -m "Add project information to README" README.md
Your dataset has now started to grow a log of everything that was done. You can view this history with the command git log, or any tool that can display Git history, such as tig. You can even ask a specific file what has been done to it:
git log README.md
While you can add and save any file into your dataset, it is often useful to know where files came from.
If you add a file from a websource into your dataset, you can use the command datalad download-url in order to download the file, save it together with a commit message into the dataset, and record its origin internally.
Here, we add a comic as a little Easter egg into the dataset:
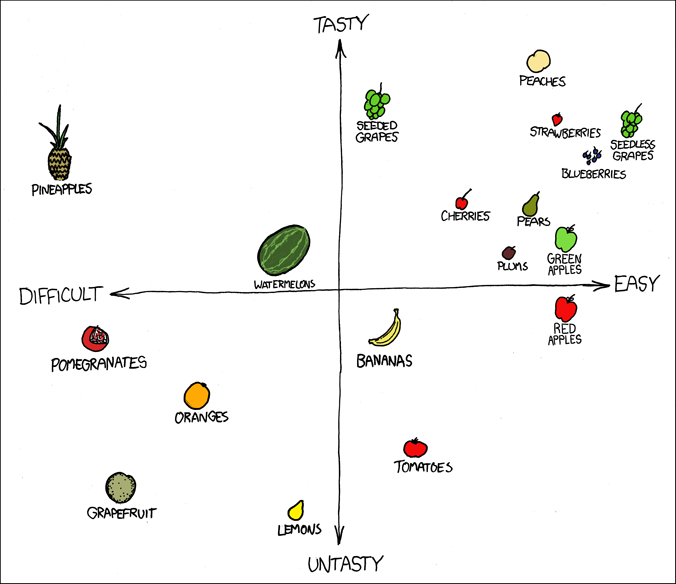
datalad download-url -m "add motivational comic to my dataset"  \
   -O .easteregg  \
   https://imgs.xkcd.com/comics/fuck_grapefruit.png
# open the comic
xdg-open .easteregg
The very first chapter of the handbook, DataLad datasets will show you even more details about version controlling files in datasets.
Data transport
DataLad datasets can track where files came from. If the origin of a file (such as a web source) is known, you can drop file content to free up disk space:
datalad drop .easteregg
Afterwards, only “metadata” about file content and file availability stays behind, and you can’t open the file anymore:
xdg-open .easteregg # its gone :(!
But because the origin of the file is known, it can be reobtained using the datalad get:
datalad get .easteregg
Opening the comic works again, afterwards:
xdg-open .easteregg
Let’s now see this in action with really large data, and use the datalad clone command to get a neuroimaging dataset published by a group of MPI researchers. First, let’s go one directory up:
cd ../
Then, we clone the dataset from GitHub:
datalad clone git@github.com:OpenNeuroDatasets/ds000221.git MPI-Leipzig_Mind-Brain-Body
You can list all directories in the dataset:
cd MPI-Leipzig_Mind-Brain-Body
ls
But even though it looks like a substantial amount of files, the total size of the dataset is very small. The du -sh (disk usage in human readable units) demonstrates this:
du -sh
The total available size of files can be shown with datalad status --annex:
datalad status --annex
Congrats! You have easy access to almost 400GB of data, but it only takes up a few MB on your computer. Let’s get one subject’s anatomical files by using datalad get and a path to one directory:
datalad get sub-010002/ses-01/anat/
Afterwards, datalad status --annex all shows how much of the total available data is already retrieved:
datalad status --annex all
Dataset nesting
Datasets can be nesting in superdataset-subdataset hierarchies.
This helps to link datasets together.
It is especially helpful to do this to link input data to an analysis dataset – it helps to reuse data in multiple analysis, to link input data in a precise version, and to create an intuitively structured dataset layout.
We will start a data analysis in the myanalysis dataset:
cd ../myanalysis
First, let’s install input data (a small dataset from GitHub) as a subdataset.
This is done with the -d/--dataset option of datalad clone:
datalad clone -d . git@github.com:datalad-handbook/iris_data.git input/
This dataset has been linked in a precise version to the dataset, and it has preserved its complete history.
Reproducible analyses
Not only can I version control data and consume data with datalad, I can also create datasets with data analyses in a way that my future self and others can easily and automatically recompute what was done.
To demonstrate this, we start by adding some code for a data analysis (copy paste from cat to the final EOT to paste the code into a file scripty.py in your code/ directory``):
cat << EOT > code/script.py

import pandas as pd
import seaborn as sns
import datalad.api as dl
from sklearn import model_selection
from sklearn.neighbors import KNeighborsClassifier
from sklearn.metrics import classification_report

data = "input/iris.csv"

# make sure that the data are obtained (get will also install linked sub-ds!):
dl.get(data)

# prepare the data as a pandas dataframe
df = pd.read_csv(data)
attributes = ["sepal_length", "sepal_width", "petal_length","petal_width", "class"]
df.columns = attributes

# create a pairplot to plot pairwise relationships in the dataset
plot = sns.pairplot(df, hue='class', palette='muted')
plot.savefig('pairwise_relationships.png')

# perform a K-nearest-neighbours classification with scikit-learn
# Step 1: split data in test and training dataset (20:80)
array = df.values
X = array[:,0:4]
Y = array[:,4]
test_size = 0.20
seed = 7
X_train, X_test, Y_train, Y_test = model_selection.train_test_split(X, Y,
                                                                    test_size=test_size,
                                                                    random_state=seed)
# Step 2: Fit the model and make predictions on the test dataset
knn = KNeighborsClassifier()
knn.fit(X_train, Y_train)
predictions = knn.predict(X_test)

# Step 3: Save the classification report
report = classification_report(Y_test, predictions, output_dict=True)
df_report = pd.DataFrame(report).transpose().to_csv('prediction_report.csv')

EOT
This created a new file in the dataset:
datalad status
Let’s save it with a datalad save command and also attach an identifier with the
--version-tag flag:
datalad save -m "add script for kNN classification and plotting" \
  --version-tag ready4analysis code/script.py
The challenge DataLad helps me to accomplish is running this script in a way that links the script to the results it produces and the data it was computed from. I can do this with the datalad run command. In principle, it is simple. You start with a clean dataset:
datalad status
Then, give the command you would execute to datalad run, in this case python code/script.py.
Datalad will take the command, run it, and save all of the changes in the dataset that this leads this to under the commit message specified with the -m option.
Thus, it associates the script with the results.
But it can be even more helpful. Here, we also specify the input data the command needs and datalad will get the data beforehand.
And we also specify the output of the command.
To understand fully what this does, please read chapters DataLad, Run! and Under the hood: git-annex, but specifying the outputs will allow me later to rerun the command and let me update outdated results:
datalad run -m "analyze iris data with classification analysis" \
 --input "input/iris.csv" \
 --output "prediction_report.csv" \
 --output "pairwise_relationships.png" \
 "python3 code/script.py"
Datalad creates a commit in my history. This commit has my commit message as a human readable summary of what was done, it contains the produced output, and it has a machine readable record that contains information on the input data, the results, and the command that was run to create this result:
git log -n 1
This machine readable record is particularly helpful, because I can now instruct datalad to rerun this command so that I don’t have to memorize what I had done and people I share my dataset with don’t need to ask me how this result was produced, by can simply let DataLad tell them.
This is done with the datalad rerun command. For this demonstration, I have
prepared this analysis dataset and published it to GitHub at
github.com/adswa/my_analysis:
cd /demo
datalad clone git@github.com:adswa/myanalysis.git analysis_clone
I can clone this repository and give for example the checksum of the run command
to the datalad rerun command. DataLad will read the machine readable record of
what was done and recompute the exact same thing:
cd analysis_clone
datalad rerun 71cb8c5
This allows others to very easily rerun my computations, but it also spares me the need to remember how I executed my script, and I can ask results where they came from:
git log pairwise_relationships.png
Computational reproducibility
If you don’t have the required python packages available, running the script and computing the results will fail. In order to be computationally reproducible I need to attach the software that is necessary for a computation to this execution record:
cd ../myanalysis
And the way I can do this is with a datalad extension called datalad containers.
You can install this extension with pip by running pip install datalad-containers.
This extension allow to attach software containers such as singularity images to my dataset and execute my commands inside of these containers.
Thus, I can share share data, code, code execution, and software.
Here is how this works: First, I attach a software container to my dataset using datalad containers-add with a name of the container (here I call it software) and a url or path where to find this container, here it is singularity hub.
This records the software in the dataset:
datalad containers-add software --url shub://adswa/resources:2
Note: You need to have singularity installed to run this!
Afterwards, rerun the analysis in the software container with the datalad containers-run command.
This container works just as the run command before, I only need to specify the container name.
If you were to rerun such an analysis, DataLad would not only retrieve the input data but also the software container:
datalad containers-run -m "rerun analysis in container" \
--container-name software \
--input "input/iris.csv" \
--output "prediction_report.csv" \
--output "pairwise_relationships.png" \
"python3 code/script.py"
You can read more about this command and containers in general in the section Computational reproducibility with software containers.
Done! Thanks for coding along! You can find out much more by checking out the Basics of the handbook, or browse the Usecases for general inspiration. Have fun!